Project Setup Tutorial
This tutorial will explain in detail how to setup a project from scratch to use ArcadeVS and start playing with the TestVehicle (or KartVehicle).
f you’re just looking to try out the plugin, you can also download the DemoProject and have fun with it. It contains a nice demo map with two game modes
- A little Racing game including UI screens, checkpoints, timers and laps
- A Free run mode where you can jump and have fun around the map with the TestVehicle.
Table of contents
Project Setup
Enabling the Plugin
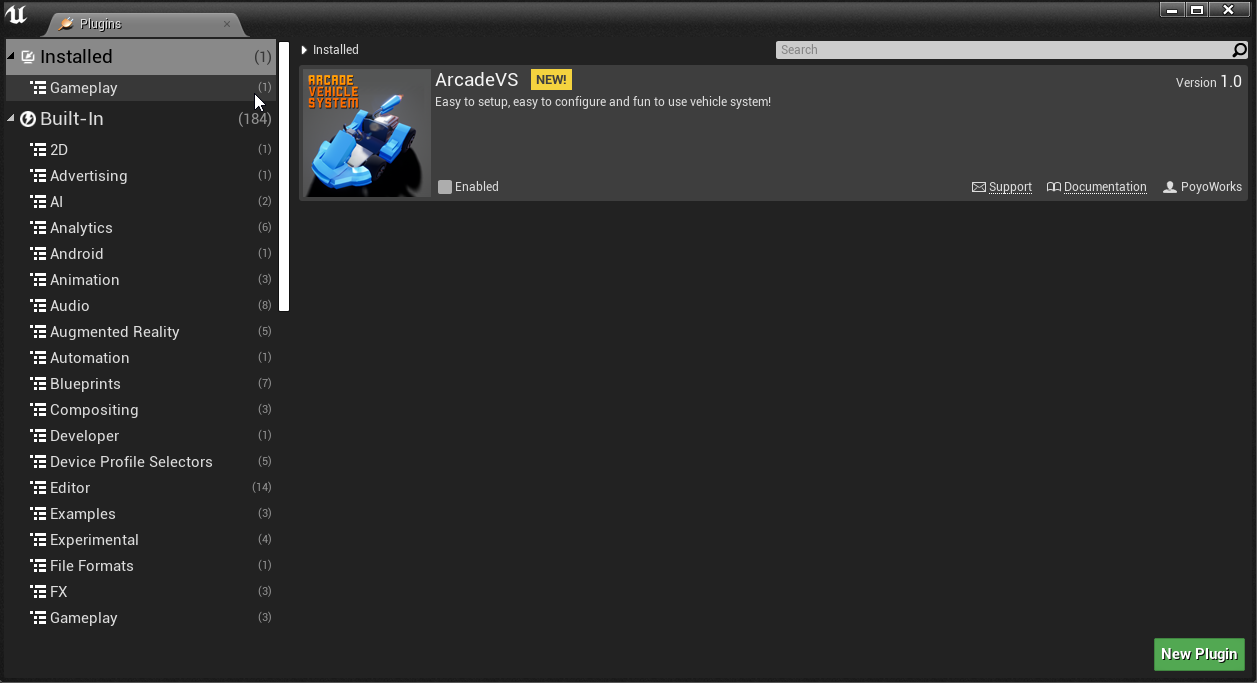
The first thing that you’ll have to do, will be to enable ArcadeVS plugin in your project.
Open the Edit -> Plugins, enable the plugin and restart the Editor.
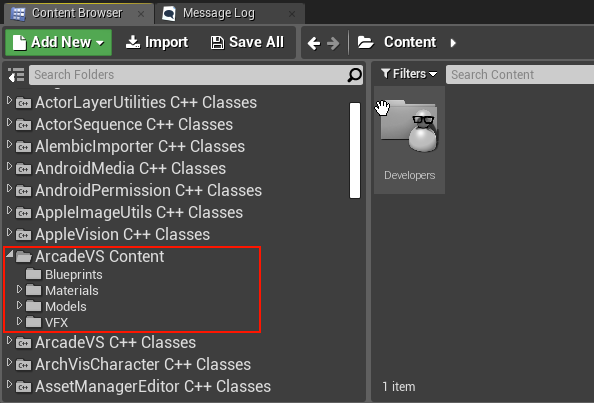
Once the Editor is restarted, if you browse the resources panel, you should now see the ArcadeVS Content folder
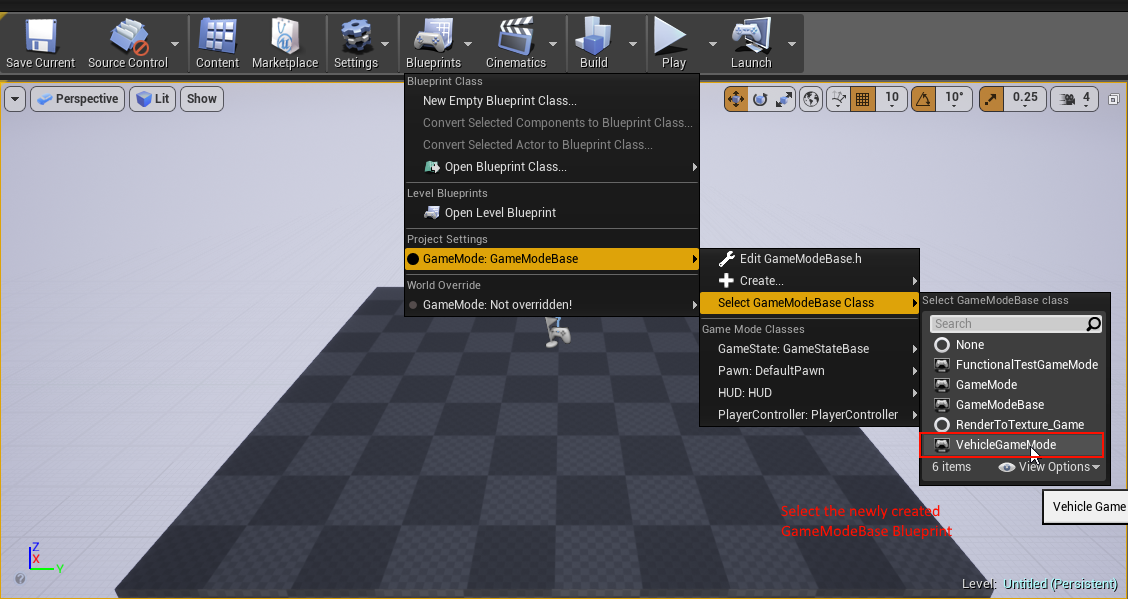
Setting up the Game Mode
Now we need to setup a new Game Mode in order to use ArcadeVS default Player Controller Blueprint
- Create a new GameModeBase Blueprint class and edit it
- Select BP_ArcadeVS_TestVehicle as the Default Pawn Class (if you don’t see it available, it means that the plugins was not properly enabled)
- Select BP_ArcadeVS_PlayerController as the Player Controller Class
- Hit Compile

Once this is done, edit the level blueprint to tell it to use our new GameMode.
Configuring Inputs
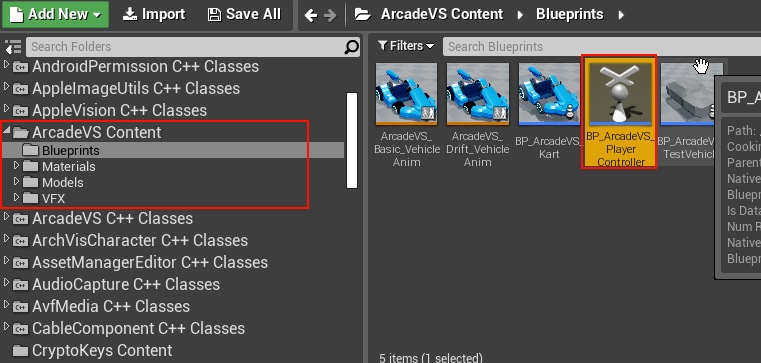
Now that we’ve setup our GameMode, let’s take a look at the BP_ArcadeVS_PlayerController Blueprint class to see what inputs its expecting. In the Content Browser, open the ArcadeVS Content folder and double click the BP_ArcadeVS_PlayerController blueprint
Now you should see all the Blueprint warnings for the Input Actions and Axis that we need to define in order to be able to control our Vehicle.
Note that there’s two possible ways to hook the Accelerate and Brake functions in the plugin, you can either define an Axis binding if you want to use a Gamepad trigger or you can simply define an Input Action to use a Button press. For now we’re going to use a Button press so we’ll define InputActions.
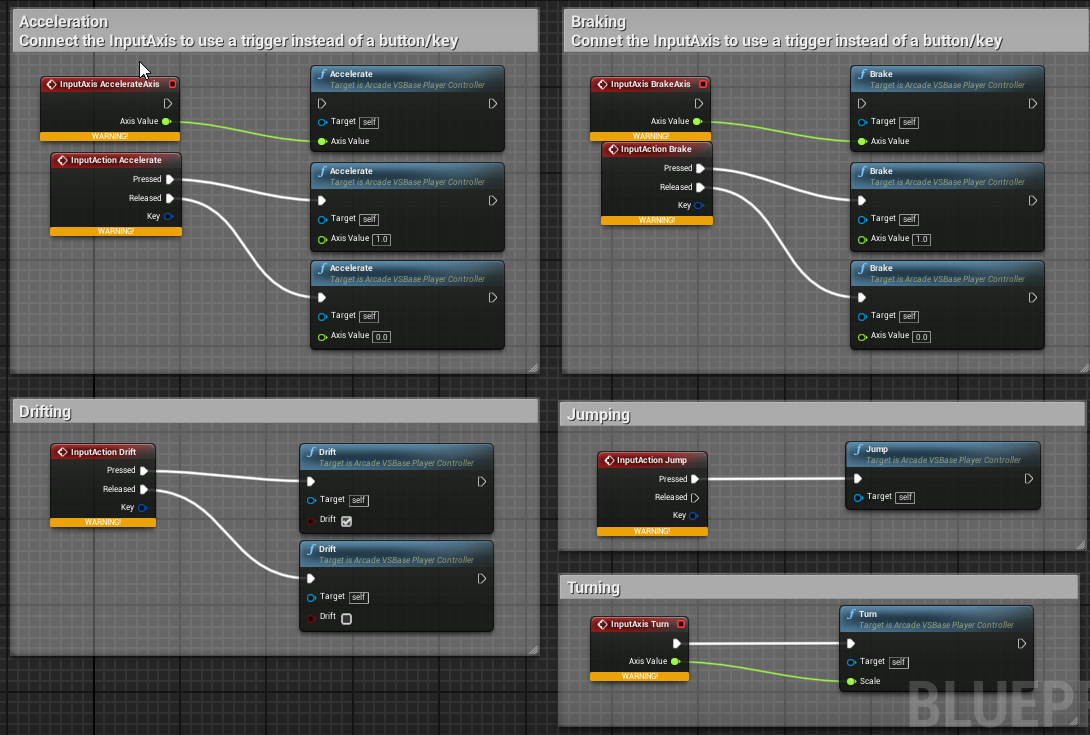
So we have to define:
- Accelerate (InputAction)
- Brake (InputAction)
- Turn (InputAxis)
- Jump (InputAction)
- Drift (InputAction)
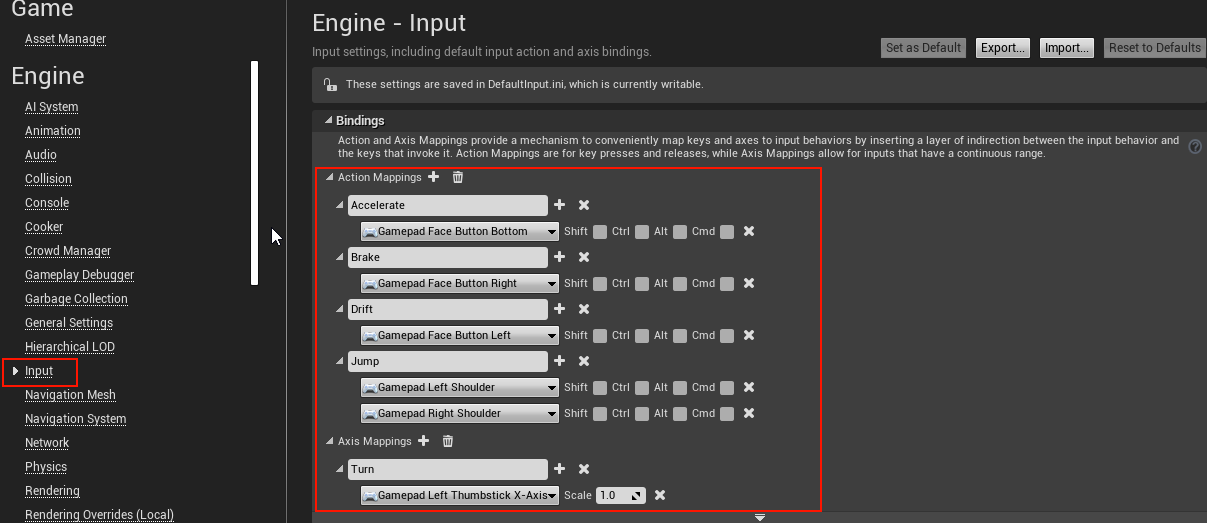
Open the Edit->Project Settings menu and add the needed inputs in the Input section.
Here’s an example setup when using a Gamepad:
Trying it out!
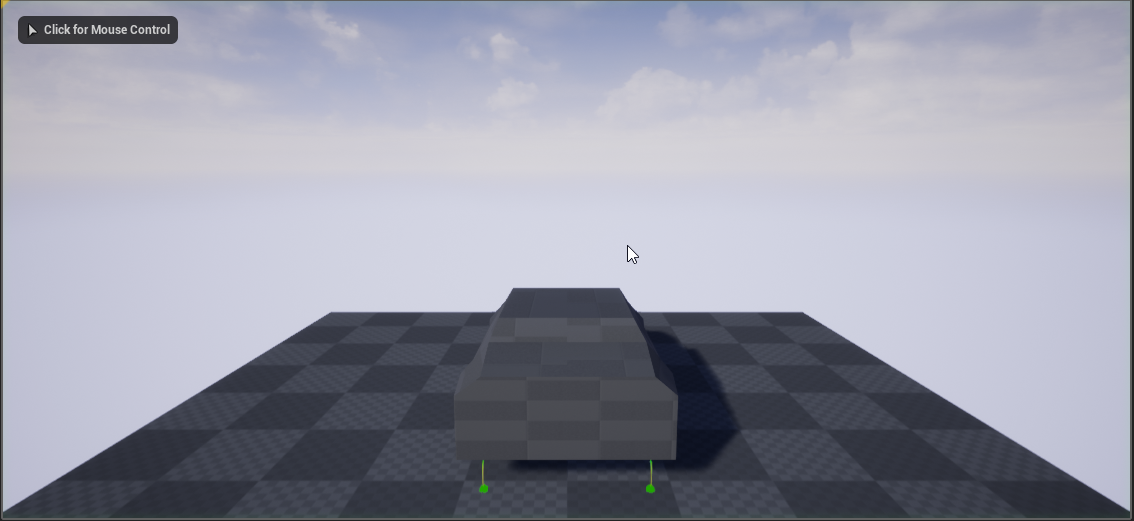
Now that the project setup is complete, hit play! You should see the TestVehicle being spawned with it debug disply enabled.
As the default ground for the level is very small, select the Floor Actor in the World Outliner window and rescale it to (100x100x1). Now you have all the space needed to try out the TestVehicle and have fun :)
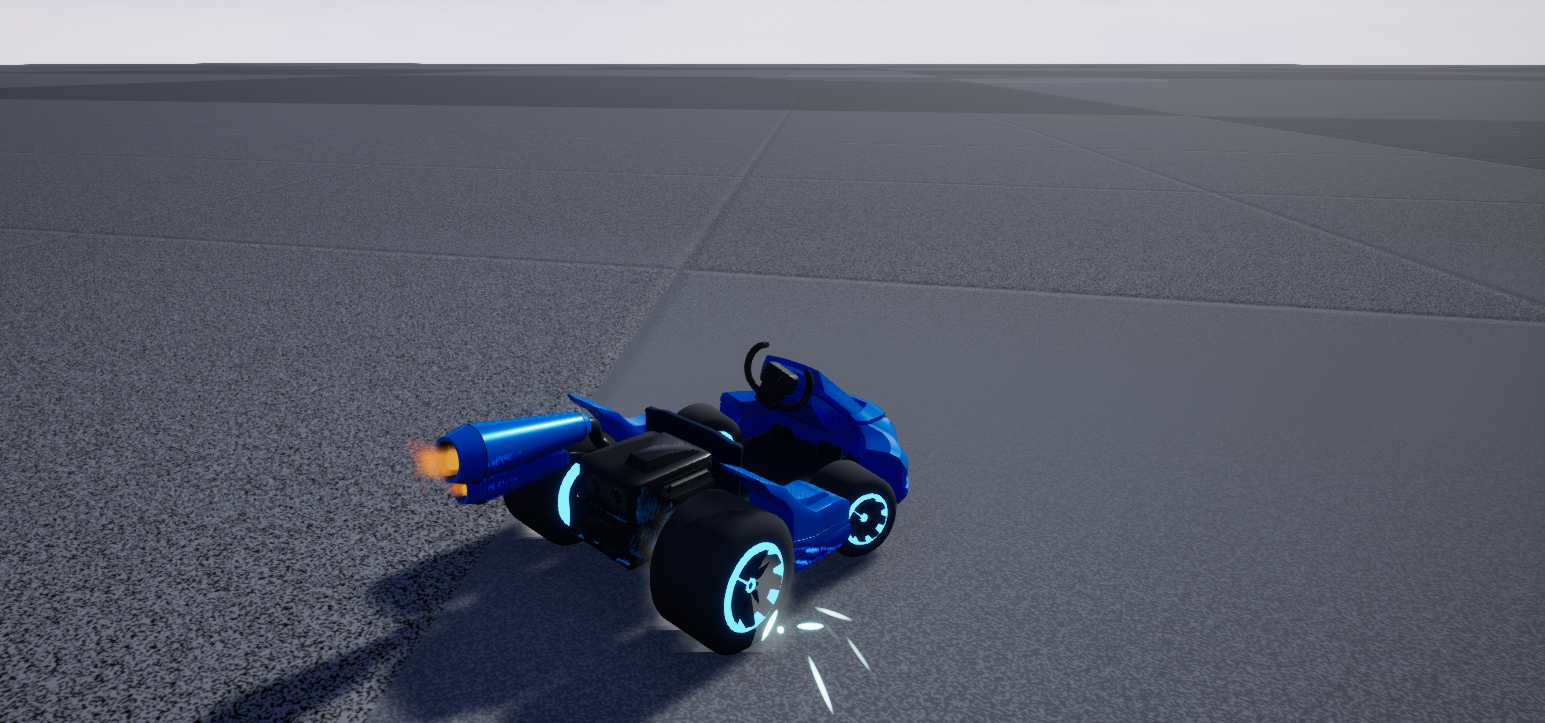
If you would like to also try the Kart Vehicle that comes with ArcadeVS to see an animated vehicle with wheels rotation, direction, simply edit your GameMode and set BP_ArcadeVS_Kart as the Default Pawn Class.
Important notes
Drifting
- The Drifting mechanic does not work as a toggle. This means that the Vehicle will keep on drifting as long as you will keep the Drift button pressed but will stop as soon as the button is released.
- Also remember that to be able to Drift a Vehicle must meet the requierements set in the Drift settings section. For the TestVehicle this means having a speed of at least 60% of its max speed and having the Turn axis value >= .9 (almost fully engaged).
Display and Antialias
- You will immediately notice that the Debug suspension lines of the TestVehicle becomes blurry when accelerating. This is not a bug and is related to Unreal’s default project settings. By default Unreal will activate Motion Blur, this is great and looks awsome but when controlling a very fast moving object with a 3rd person camera, it does not look great.
To fix this, go to Edit->Project Settings search for Motion Blur and deselect it.
- Note that the default Antialias settings TemporalAA can also show some artifacts. You can always switch to the faster FXAA to get rid of them.