Custom Vehicle Tutorial
Now that you have a basic understanding on how ArcadeVS works and that you’ve tested the defaults vehicle, its time to make your own :)
This document will detail the steps needed to prepare a Vehicle Skeletal Mesh and set it up properly to be used with an ArcadeVS vehicle.
For this Tutorial I’m going to use a nice low-poly 3D car model coming from Synty Studios - Simple Racer Pack
Table of contents
Mesh Setup
The first thing you will want, is to make sure that your Vehicle Mesh is a Skeletal Mesh. You Mesh has to be rigged, this is needed for the following reasons:
- The Suspension system will need Bones Locations to use as positions to shoot its raycasts and apply the suspension forces
- We want to use Animation Blueprints to animation the Wheels direction and rotation.
If you’ve bought a 3D Vehicle Asset Packs, all the models will probably already be rigged and have their bones properly setup.
Basically, you want your mesh to follow Unreal’s Vehicle Art Setup guidelines Vehicle Art Setup
Do not worry about the physics asset section as we’re going to do it in the nest step. For now just make sure that your have at least your 4 bones and that the mesh and the bones are properly oriented.
Physics Material Setup
Now that we’ve validated that our Mesh is properly rigged and its Bones properly oriented, we need to set its Physics Material.
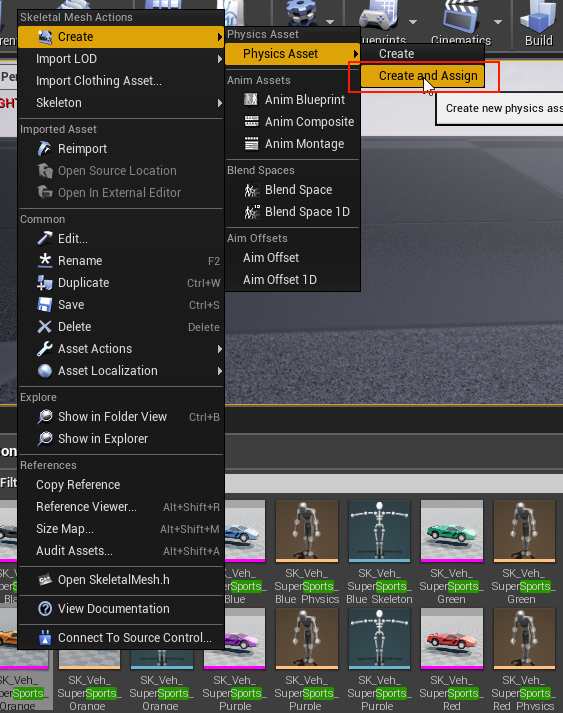
If your mesh already has a Physics Material assigned, go and Edit it. Otherwise, you can right click on your Skeletal Mesh in the Content panel and Create->Physics Asset->Create and Assign.
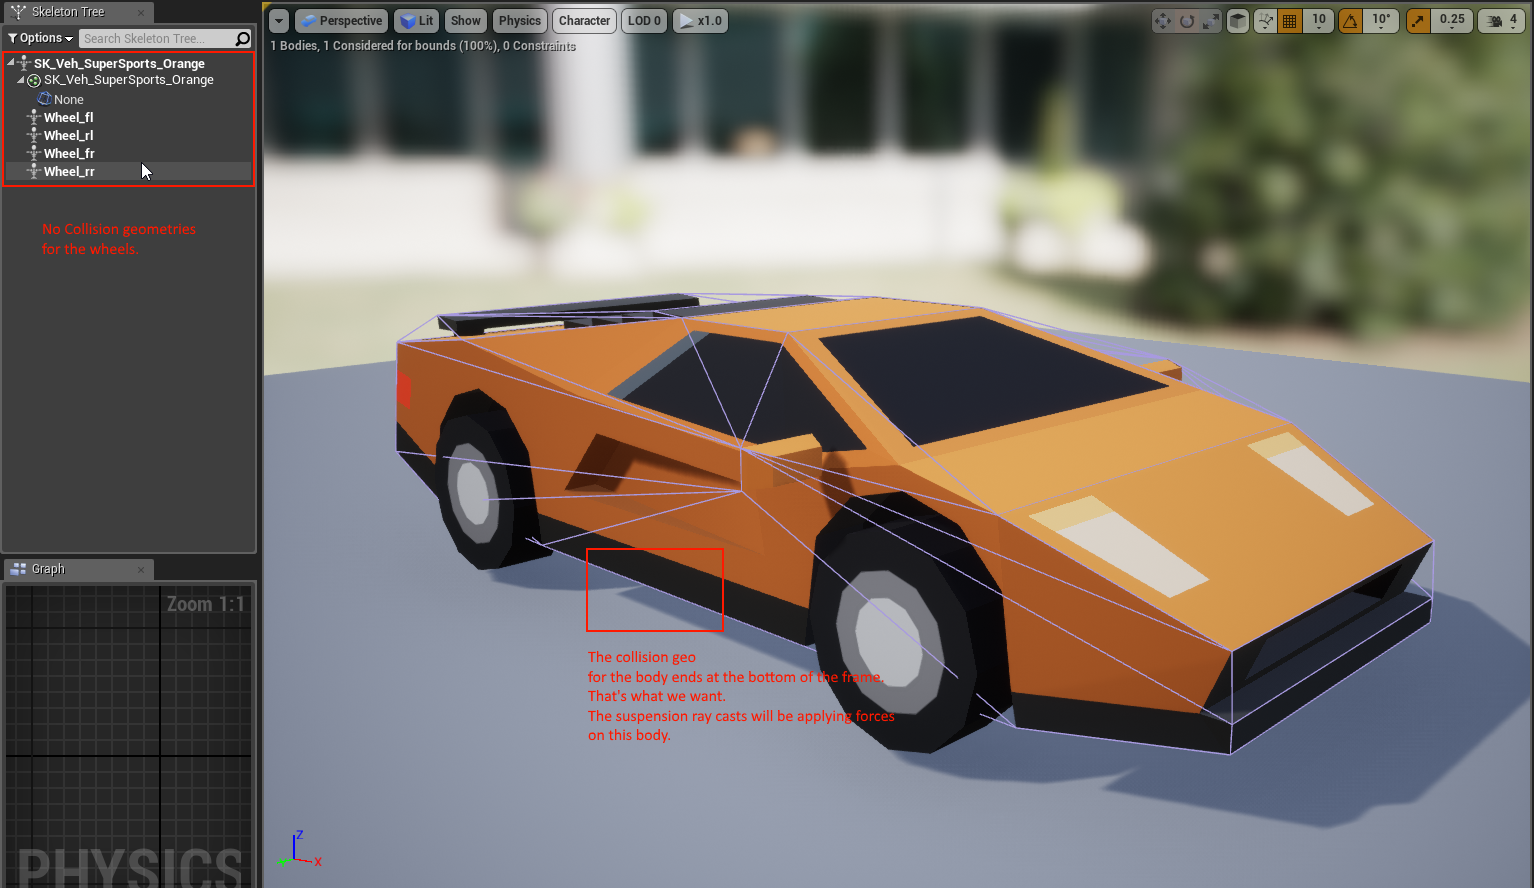
Now, and this is important to understand, as the Suspension will all be done by using raycasts, we don’t want to have any collision geometry for our wheels. We only want to have collision geometries for the body of the car.
For example, here is how the car from the Synty’s pack is setup:
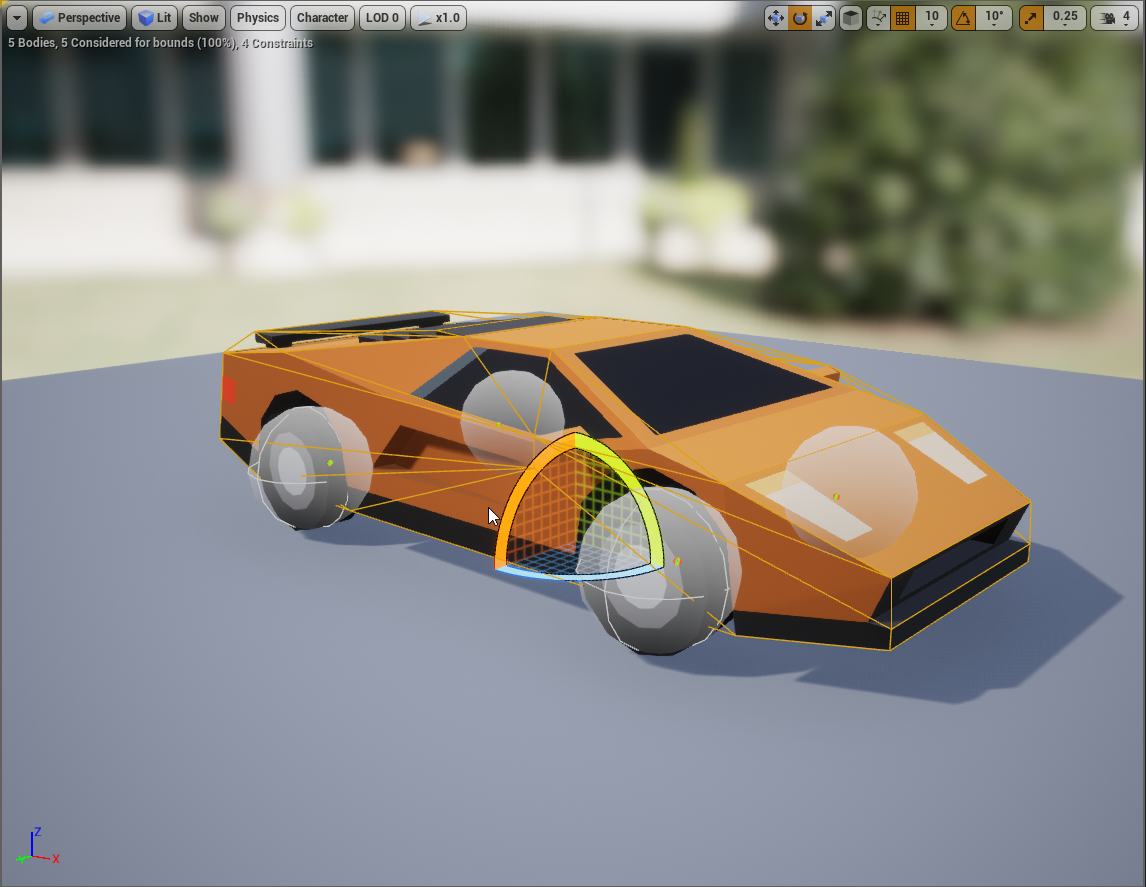
You can see that it has many physics body defined and has spheres for the wheels. We want to remove all those bodies and simply keep the physics body for the frame of the vehicle.
Once this is done, the Physics Material for our Vehicle should look like this:
Creating the new Vehicle
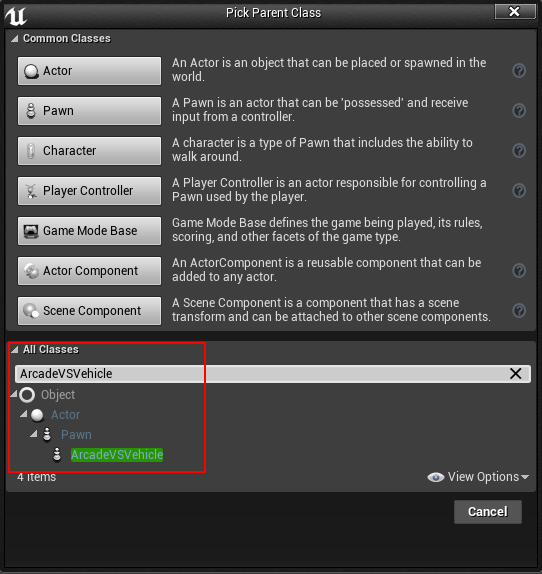
Now that our Skeletal Mesh is ready, we can create a new Blueprint and select ArcadeVSVehicle as it’s parent class.
Double click the newly created Blueprint to edit it.
Adding the Visualizer
To make easier to see what we’re doing and layer on fine tune our vehicle, we’re going to directly add the Visualizer Component to our newly created Vehicle.
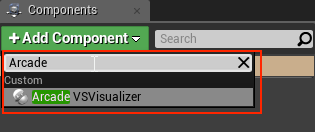
The Visualizer will have all settings activated by default, which is fine as it will allow us to easily see our suspension setup.
Skeletal Mesh settings
The first thing to do is to set our new Skeletal Mesh as the Vehicle Skeletal Mesh. To do this, select the VehicleSkeletalMesh component in the components panel and assign your mesh to the Skeletal Mesh parameter. You should now see your Vehicle in the Viewport.
Now, we want to enable physics for our Vehicle. To do this, still with the VehicleSkeletalMesh component selected, tick Simulate Physics in the Physics settings and set the Collision Presets to BlockAll in the Collision settings. Remember that Unreal will not simulate physics if you don’t set a valid Collision Profile!
Now if you hit the Simulate Button you should see your car falling down the screen.
Suspensions Settings
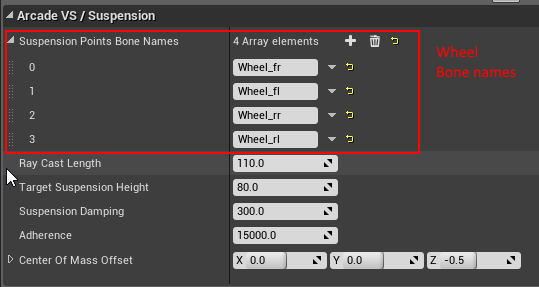
Now we need to setup the suspension system. To do this, select the Root Component of your Vehicle. You should now see all the ArcadeVS settings panel. The first one being ArcadeVS / Suspension
In the first settings Suspension Points Bone names, hit the + button 4 times to create four entries, and enter the name of each wheel bone of your Skeletal Mesh. You should end up with something like this:
First test
Now that our Mesh is setup and our suspension system is configured, we can do a first test.
Before, make sure that you have properly set the Default Pawn Class and Player Controller for your GameMode and that you’ve created the needed inputs. (you can check ArcadeVS Project Setup from scratch where all those steps are explained in details).
Once this is done, hit play!
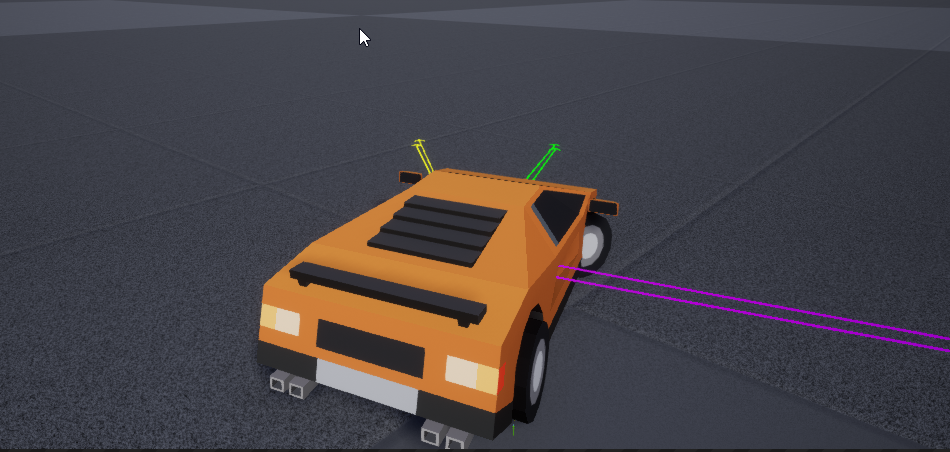
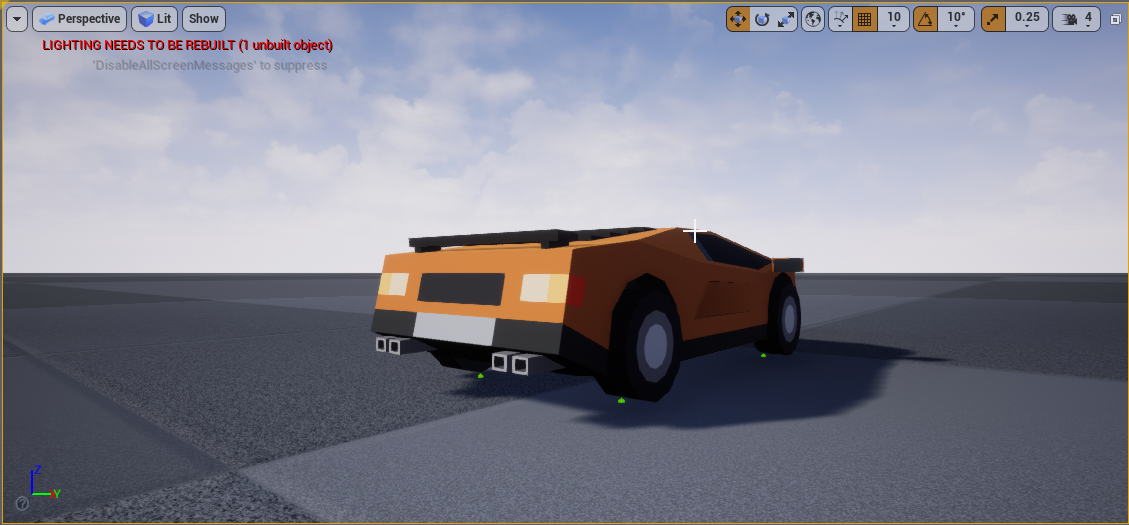
If everything works correctly, you camera should be at the Origin and you should see a part of your Vehicle. To validate, hit the Eject button (make sure that you are testing in the Editor Viewport and not in Standalone mode or you won’t be able to Eject) and move the camera to look at your Vehicle.
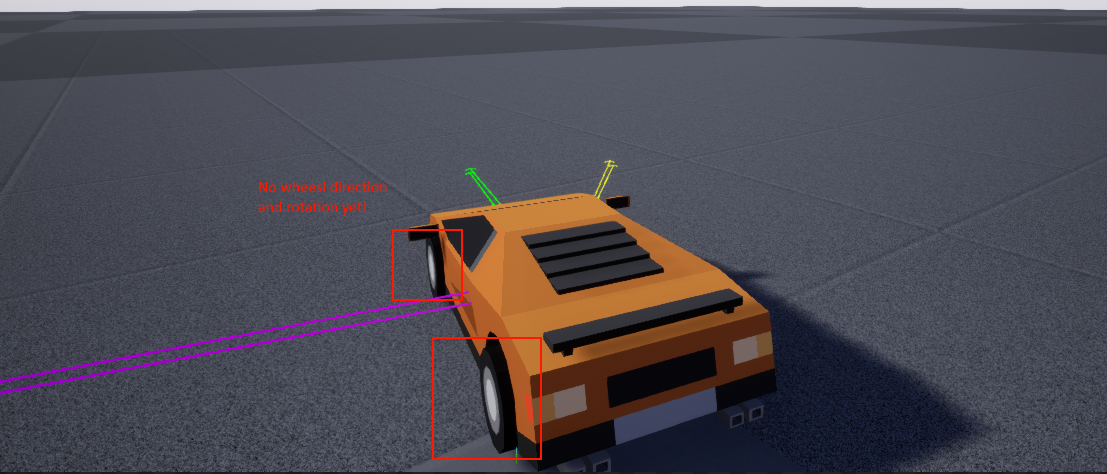
You should see your vehicle resting above the ground and be able to see the Visualizer Raycast traces as small green dots intersecting the ground under your wheels.
System Tuning
Now that the basic setup is done we’re going to fine tune our vehicle to make it playable.
Camera
Right now the vehicle should be already controllable but without a properly set camera, it’s pretty much useless.
So what we need is to add a Spring Arm and a Camera to our Pawn so that we can set a nice view angle when playing. I’m not going to detail those steps as you’re probably used to setting up those components if you’re familiar with Unreal. If that’s not the case, you can check ArcadeVS default Vehicles and simply copy the SpringArm and Camera components to your new vehicle Blueprint.
Now if you hit play, you should have a nice view angle and already be able to fully control the vehicle.
Setting up the Animation Blueprint
Ok we have a playable vehicle but it looks very stiff. That’s because we havent setup our Animation Blueprint yet so our wheels do not turn and do not reflect the turning direction, let’s fix this.
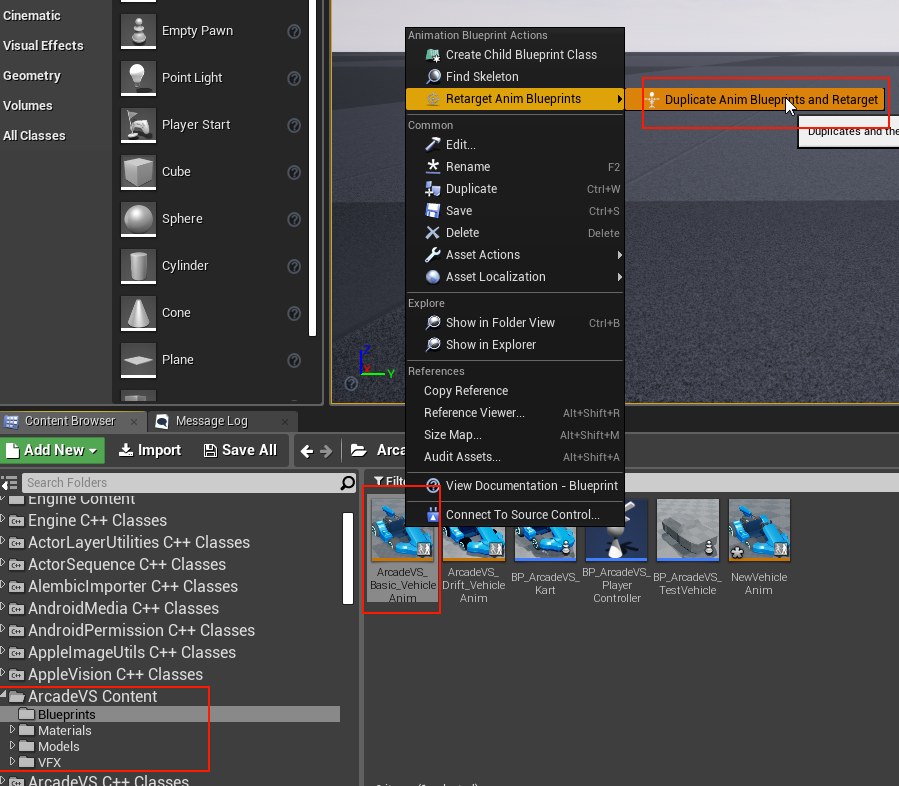
- Locate the ArcadeVS_Basic_VehicleAnim Blueprint in ArcadeVS Content folder, right-click it and Retarget Anim Blueprints->Duplicate Anim Blueprints and Retarget.
- In the Retarget popup, uncheck the checkbox Show only Compatible Skeletons
- Select the Skeleton of your new vehicle Skeletal Mesh
- Now that the Animation Blueprint has been duplicated, copy it the Content folder of your project
- Double click it to enter Edit mode and double click on the AnimGraph in the left panel under the mesh preview
This Animation Blueprint is responsible for applying the Wheel Direction and Wheel Rotation parameters computed by the C++ Arcade Vehicle System to the wheel bones of your skeletal mesh. But right now, it’s made to work with ArcadeVS Default Vehicles bones names.
If you’ve done everything correctly (and that your skeletal mesh bones where not exactly the same name as the default vehicles ones), you should have warning under each Transform (Modify) Bone, that’s expected and we’re going to fix this!
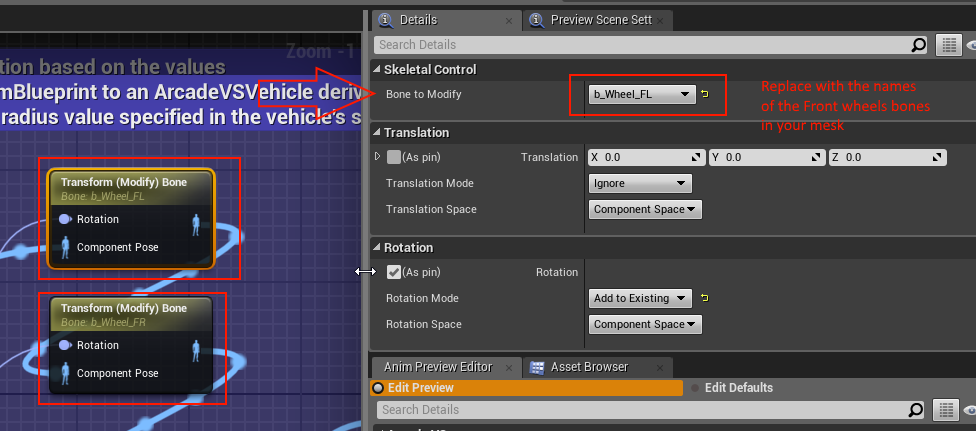
To fix it, we just have to change the name of the bones in the Transform (Modify) Bone Blueprint nodes.
The two top Transform (Modify) Bone nodes are responsible for applying the Wheel Direction on the front wheel. Select each of those nodes and select the corresponding wheel bone in your skeletal mesh.
The four Transform (Modify) Bone under are responsible for rotating the wheels based on the speed of the Vehicle. Select each of those nodes and also select the corresponding bone.
Now hit Compile, all warnings should be gone.
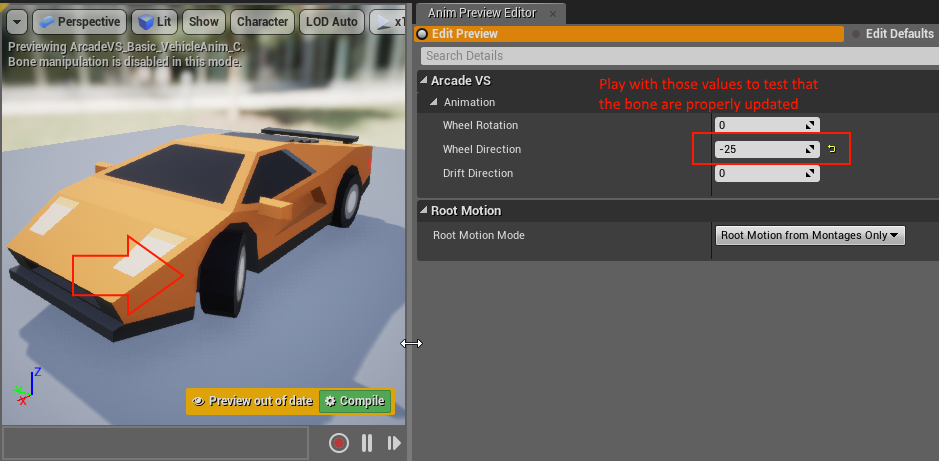
A good idea to validate that the Animation Blueprint is working as expected is to play with the ArcadeVS Animation settings in the Anim Preview Editor panel. You should see your mesh preview update in realtime to the changes.
Assigning the Animation Blueprint
Our Vehicle is almost complete now. As the last step we just need to assign our newly created Animation Blueprint to our Vehicle Skeletal Mesh.
Go back and Edit your new Vehicle Blueprint. Select the Skeletal Mesh component in the Components panel and under Animation select:
- Animation Mode Use Animation Blueprint
- Anim Class Select the new Animation Blueprint we just created
Hit compile and play!
You should see the wheels of your vehicle rotate and turn.